 |
Introducing the Grammarly Editor
You can access the Grammarly Editor directly from your browser in case you prefer not to download any other applications to your computer. In the Grammarly Editor, you can create and edit documents, adjust your settings, and manage your subscription.
Additionally, the Grammarly Editor is available via Grammarly’s desktop app, which you can download here.
Note: The Grammarly Editor is also available on iPads. For more information, check this article.
This article covers the following topics:
- Accessing the Grammarly Dashboard
- Creating and uploading documents
- Editing text
- Deactivating certain suggestion types
- Formatting text
- Checking your document for plagiarism
- Adjusting goals
- Changing font size and other settings
- Downloading documents
- Reviewing document statistics
- Submitting expert writing service orders
Accessing the Grammarly Dashboard
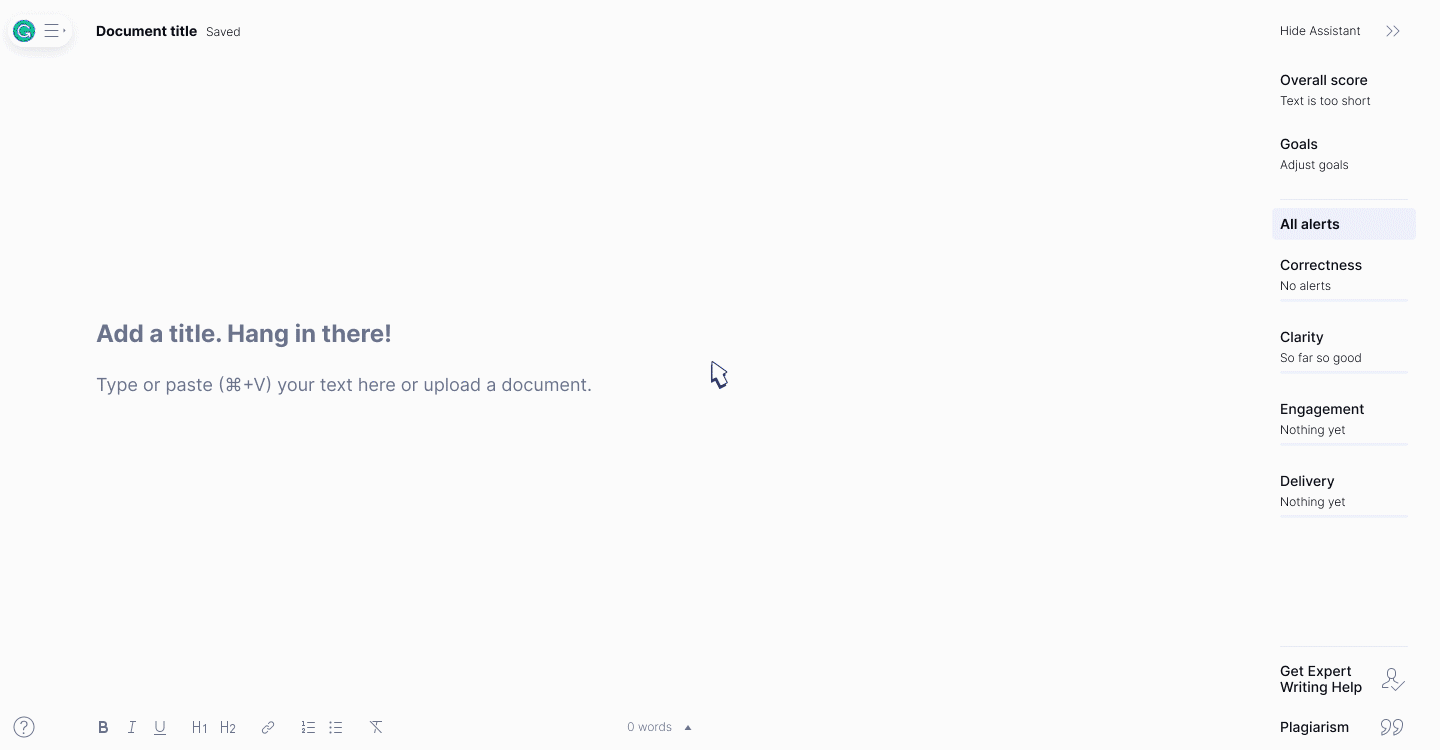
The Grammarly Dashboard will appear immediately after you log in to your account at https://app.grammarly.com/. This page allows you to manage your settings and your documents. Here you can:
- upload or create documents
- manage all of your saved documents
- upgrade your account or manage your subscription settings
- update your account settings
- review the list of Grammarly products you can download

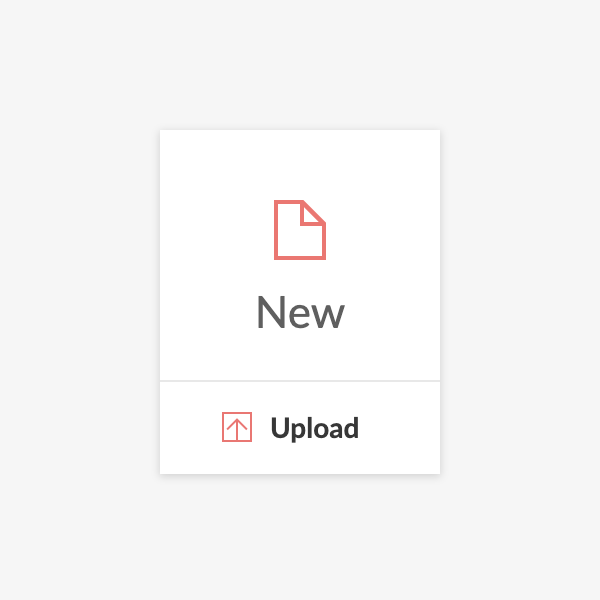
Creating and uploading documents
You can start working on a new document by clicking the New button. If you want to check an existing document on your computer, click Upload:
You can also upload another document for checking after you’ve started editing. To do that, click the G icon in the upper left corner of the screen and select New or Upload file:
Another option for importing existing text is to create a blank document, then paste in text from your clipboard.
Note: If you use this option, some of your document’s original formatting may be lost.
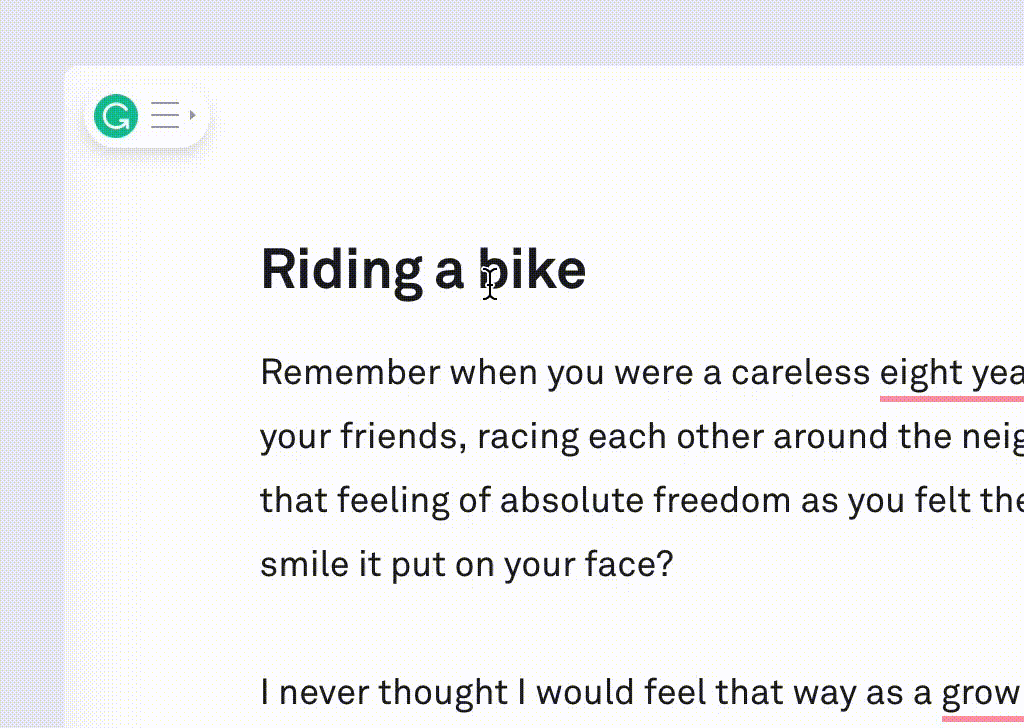
Editing text
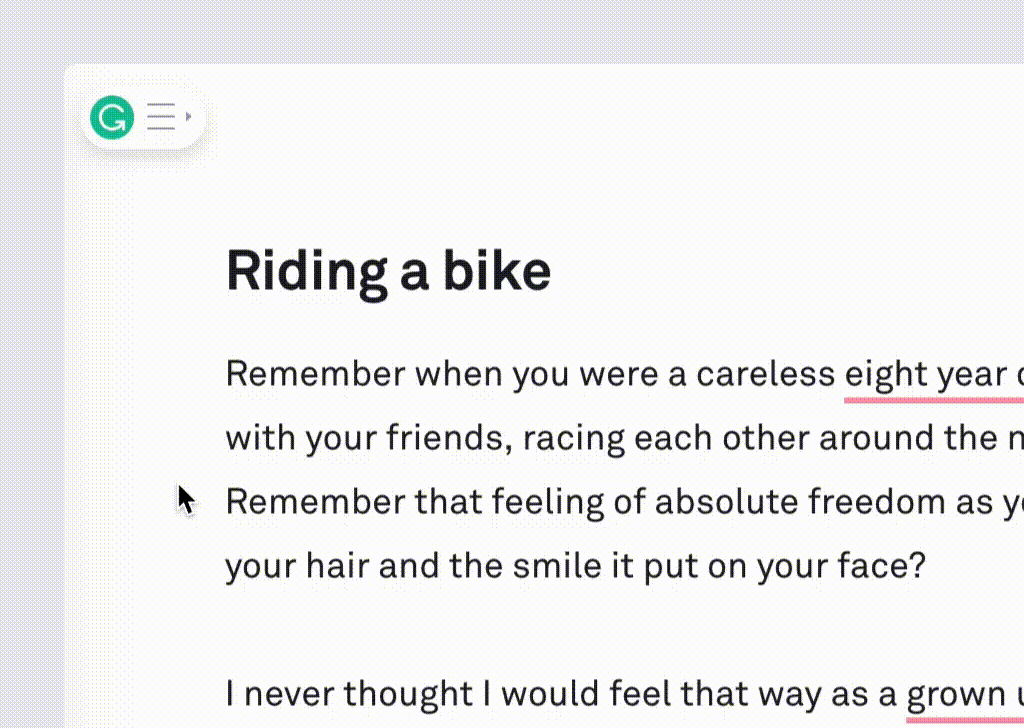
Grammarly automatically checks everything you type, making it easy to spot and fix errors quickly. While your document is being checked, the Overall score icon moves in a circle to indicate that checking is in progress. You can keep typing, and Grammarly will continue checking.
When Grammarly detects a writing issue in your text, you’ll see a red, blue, green, or purple underline. Click on any underlined word or phrase to see Grammarly’s suggestion.
To accept a suggestion, simply click on it:
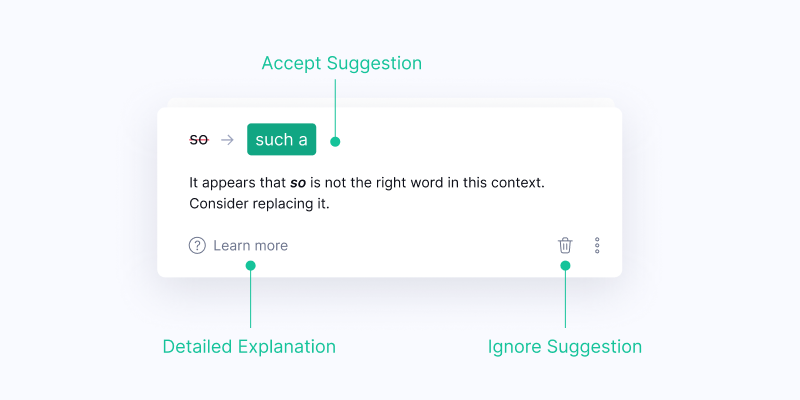
If you’d like to ignore a suggestion, simply click the trash can icon to dismiss it.
To see a detailed explanation about a suggestion, click Learn more at the bottom of the alert.
If a suggestion is incorrect or you’d like to report it for any reason, click the three dots and choose your preferred option to proceed.

If you’d like Grammarly to stop flagging a particular spelling as incorrect, you can add the word to your personal dictionary by clicking the Add to dictionary button.
For more information on text checking, check out this page.
Deactivating certain suggestion types
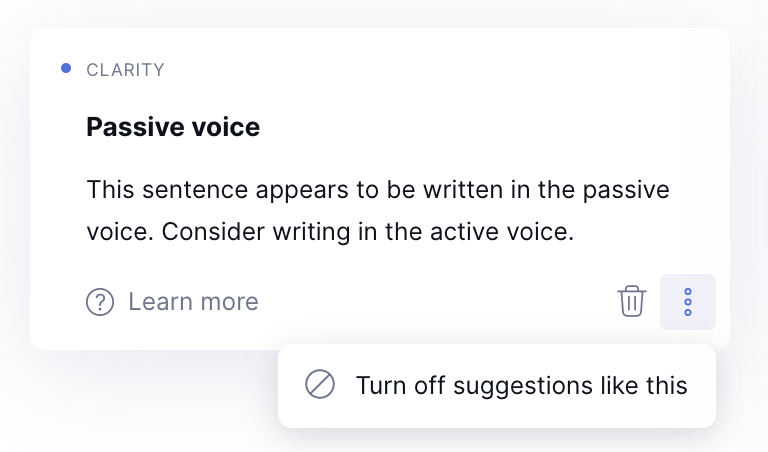
Certain types of suggestions, such as Oxford comma and passive voice alerts, can be turned off.
If you see a suggestion that is not helpful, click the three dots in the lower right corner of the suggestion card. If it’s a suggestion that can be deactivated, you’ll see an option that says Turn off suggestions like this:
To turn deactivated suggestions back on, click the Deactivated suggestions icon in the right-side panel:

Note: This feature is available only to Grammarly Premium, Grammarly Business, and Grammarly @edu users.
Formatting text
If you create a new document or copy your text into the Grammarly Editor, you can use these formatting options:
- Bold and italic text
- Numbered lists and bullet points
- H1 and H2 headers
- Links

You can also clear the formatting in a particular phrase by selecting it and clicking the Clear formatting button.
Note: If you uploaded your document to the Grammarly Editor, our formatting options will be deactivated. This is done in order to preserve the formatting of your original document. Although your document will appear as plain text in the Grammarly Editor, your original formatting will be preserved in the version you download after editing. To learn more about how to preserve the original formatting, check this article.
Checking your document for plagiarism
If you have a Premium subscription, you can check your document for plagiarism. Keep in mind that the plagiarism checker is deactivated by default.
To check your text for plagiarism, click the Plagiarism button in the lower right corner:
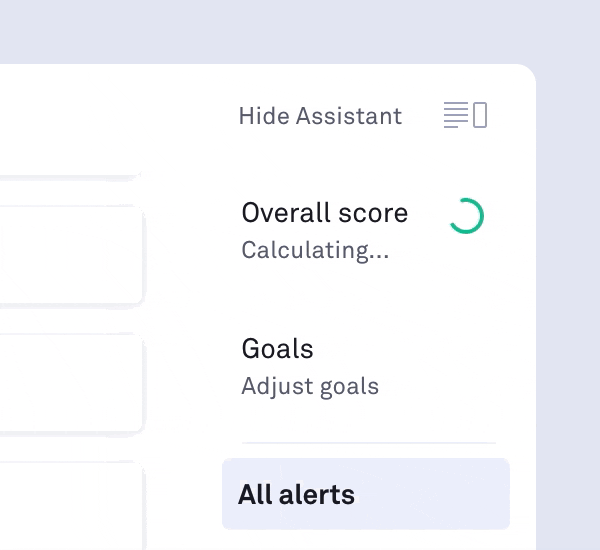
Adjusting goals
If you want to achieve a specific goal with your text, Grammarly’s here to help! To adjust your goals, click Goals in the right-side panel, choose your preferred settings, and click Done:

Note: The Domain feature is available only to Premium, Business, and Grammarly @edu users.
Changing font size and other settings
You can adjust several aspects of your experience with the Grammarly Editor:
- Turn off auto-jumping to the next alert
- Prevent Grammarly from checking quoted text
- Increase the document’s font size
Note: The option to exclude quoted text from checking is available only in the online Grammarly Editor and Grammarly’s desktop app. This setting will deactivate all suggestions on quoted text. Grammarly will still check quoted text for plagiarism.
To adjust your Editor Settings, open any document and click the gear symbol in the lower left corner of the page. In the window that opens next, simply toggle the switch next to your preferred setting:

Downloading documents
Once you’ve finished editing, you can download the document by clicking the G icon in the upper left corner and selecting Download:
If you started by uploading a document file, Grammarly will export your document in the same file format that you began with (for example, if you started by uploading a .doc file, your Grammarly document will be available to download as a .doc file).
You can also copy your text to the clipboard. The clipboard is a temporary storage area where material cut or copied from a file is kept for pasting into another file. You may paste the copied material by using the Ctrl + V (on Windows) or Cmd + V (on macOS) key combination.
Reviewing document statistics
You can view your document statistics by clicking Correct with Assistant and selecting the Overall score option. This section offers a lot of useful information about your text, including word count and the number of characters it contains.
If you'd like to download a PDF report of your document statistics, go to Overall score and select Download PDF Report in the pop-up menu that will open:
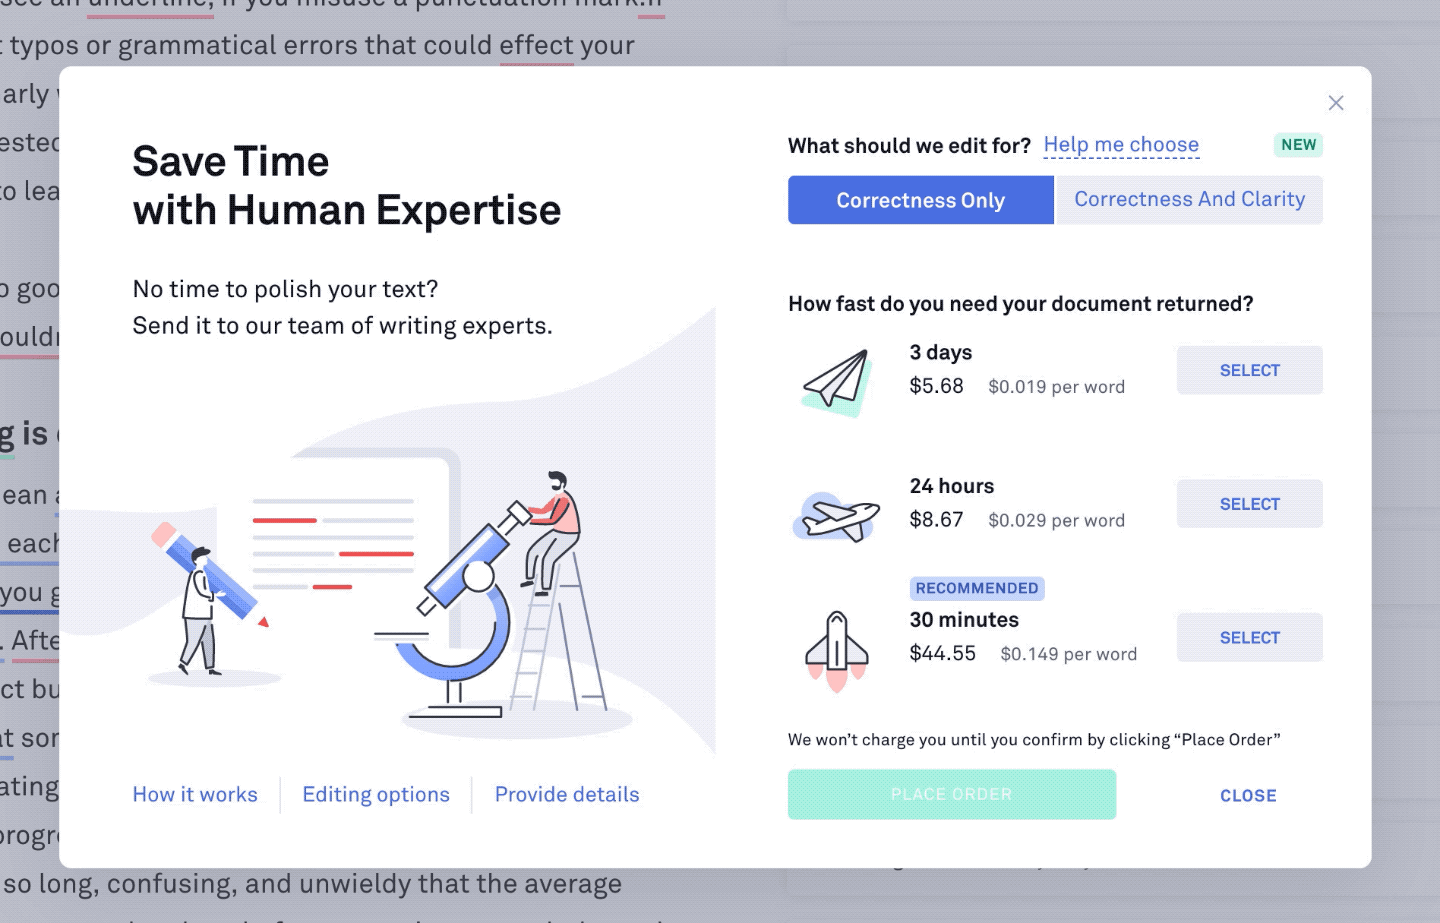
Submitting expert writing service orders
Grammarly’s expert writing service is a unique feature that lets you send your document to a team of writing experts. Our experts will thoroughly review your document within the turnaround time that you select.
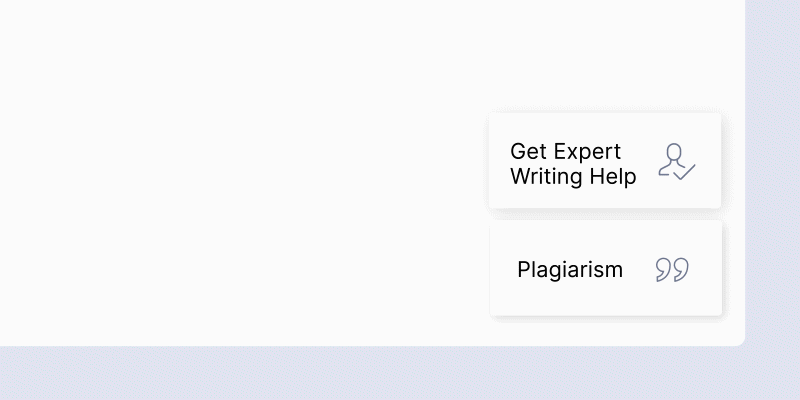
To submit your document, click Get Expert Writing Help in the lower right-hand corner of your document and choose from the following options:
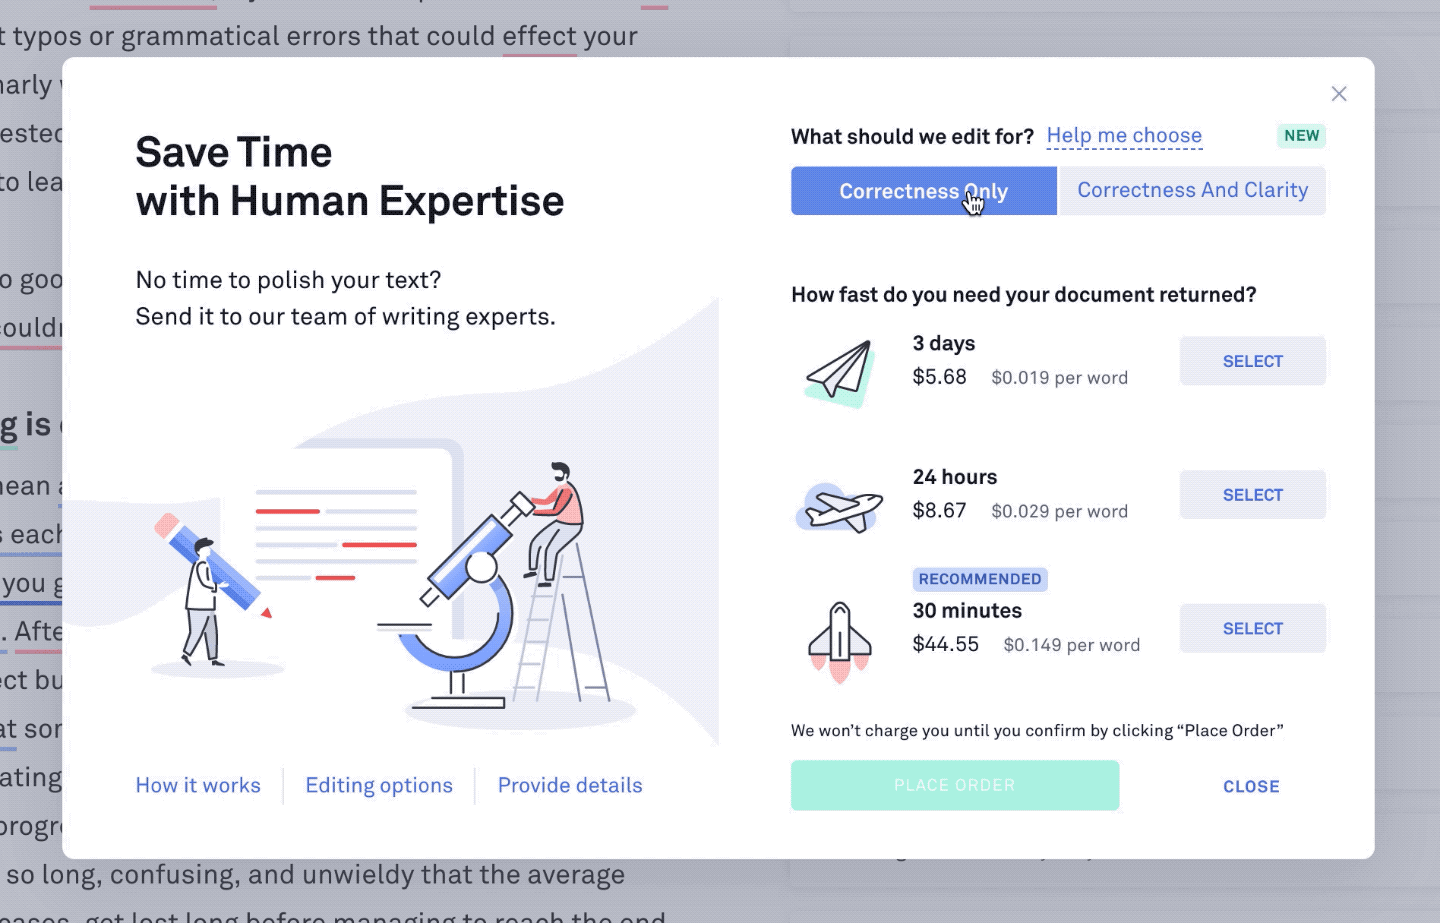
Our writing experts can review your work for Correctness only or for Correctness and Clarity. If you choose Correctness only, they’ll correct any spelling, grammar, or punctuation issues. If you choose Correctness and Clarity, they’ll correct mistakes and make your work more concise, precise, and easy to read.
You can then choose your preferred turnaround time and other editing options to help us provide you with personalized corrections:
For more information about this service, please refer to this article.
Password zip file: gfxmentor1.blogspot.com
Post a Comment